
How to Create the Most Perfect Wedding Invitations: Your Ultimate Guide to Custom Wedding Invites

October 10, 2024
When it comes to planning a wedding, every detail matters. Your wedding invitations are no exception.
Whether you’re hosting a grand affair or an intimate destination wedding, your invitations set the tone and provide guests with a preview of what to expect on your special day. Creating wedding invitations can be a fun and creative process, and with a few tips and tricks, you can craft beautiful, custom invitations that won’t break the bank.

Why Wedding Invitations Matter
Think of your wedding invitations as the movie trailer for your wedding. They give your guests the first taste of what’s to come and set the stage for the aesthetic and feel of your big day. From the type of paper to the fonts and wording, each detail plays a role in building anticipation and excitement.


Your Ultimate Guide to Custom Wedding Invites
Getting Started: Save the Date Cards
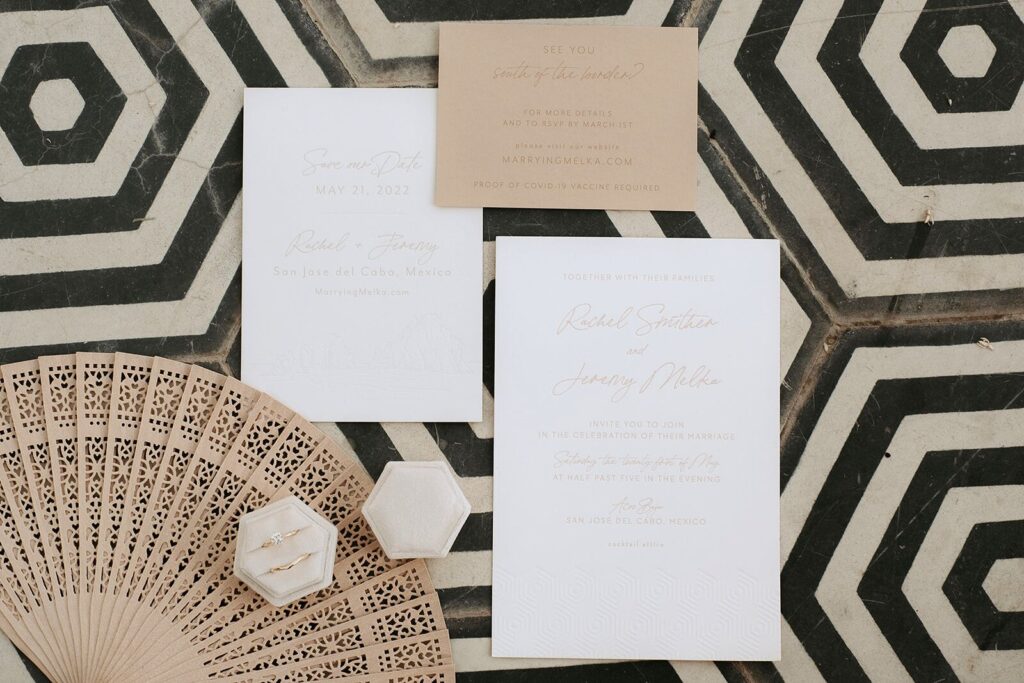
The Save the Date card is your first point of contact with your guests. It helps them reserve the date and start planning travel, especially for a destination wedding.
Including your wedding website link on the Save the Date is a helpful way to provide guests with access to travel information, accommodation details, and any other logistical elements they need to know.
For my own destination wedding, I included a note on the wedding website asking guests for a “soft RSVP” to help with early planning.
This can be particularly helpful when you need a headcount well in advance, as is often the case with destination weddings.


Choosing Your Wedding Invitation Suite
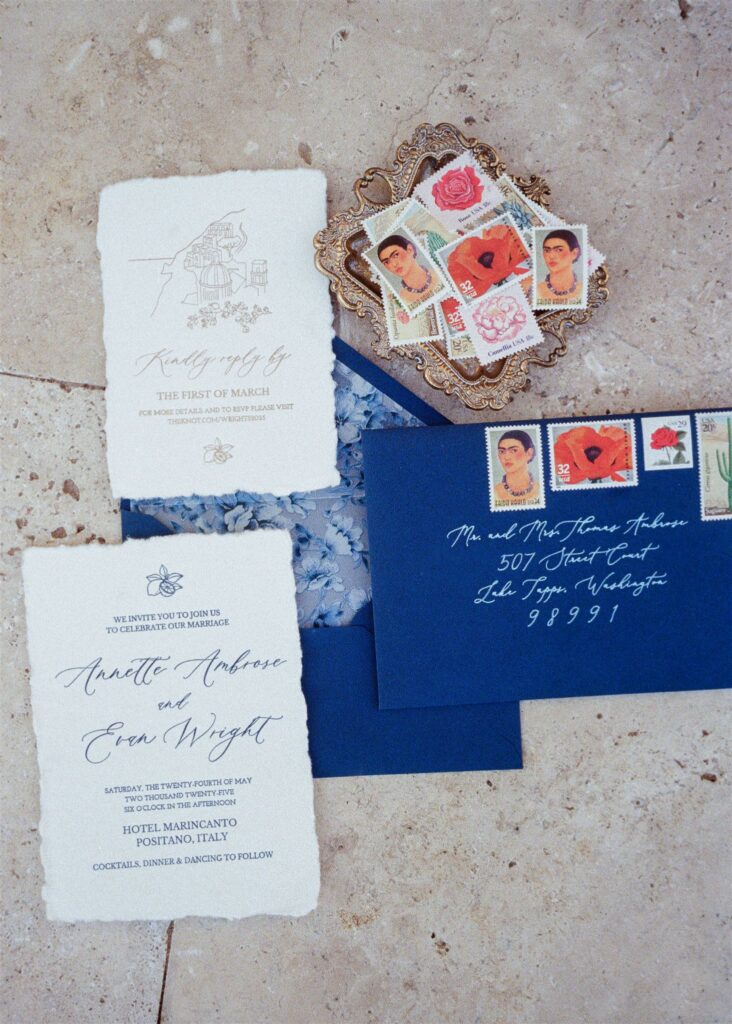
For my destination wedding in Italy, I opted for a three-piece invitation suite: an Invitation Card, a Welcome Party card, and an RSVP card.
This minimalist approach not only saved on printing costs but also ensured that guests received all the necessary information without overwhelming them.
While tradition suggests sending invitations 6-8 weeks before the wedding, for a destination wedding, it’s often best to send them earlier. I chose to mail mine in January, just after the holiday rush, giving guests ample time to plan.
Custom Wedding Invitation Printing Techniques
Creating custom invitations can be a costly affair, but understanding the different printing methods can help you decide where to splurge and where to save.
Digital Printing (Flat Printing)
- This is the most budget-friendly method and is perfect for designs with watercolor or intricate details.
- Digital printing offers a smooth finish and can easily accommodate a wide range of colors.
Letterpress
- Known as the “Queen of Stationery,” letterpress gives invitations a raised, textured feel by pressing the design into the paper.
- While traditional letterpress can be expensive, you can DIY this technique at home using a Cricut. I recommend Boxcar Press for creating custom letterpress plates.
Foil Printing
- Foil printing involves stamping foil into the paper, offering a metallic, raised effect. It’s a great way to add a touch of luxury.
- This can also be DIYed with a Cricut and foil transfer blades, allowing you to achieve an upscale look without the hefty price tag.


Creating Custom Wedding Invites at Home
If you’re looking to create your own custom invitations, I highly recommend investing in a Cricut. This versatile tool can cut intricate designs, write custom calligraphy, and even emboss and foil print.
Here are a few Cricut tips for crafting professional-quality invitations at home:
- Foil Printing and Embossing: Use Cricut’s foil transfer and embossing blades to add custom textures and finishes.
- Calligraphy: Cricut can handle custom lettering, which is perfect for those of us who might not have the best handwriting.
- Envelope Inserts: Cut unique shapes for envelope inserts, adding an extra layer of sophistication.
- Letterpress: Combine the capabilities with a Boxcar Press photopolymer plate for affordable, custom letterpressing.
Letterpressing at Home
To start off creating a letterpress invite, make sure you purchase these items below. Below, I have linked my Amazon Storefront with these products.
- Handmade deckle edge blank paper
- Photopolymer plate from Boxcar Press
- Caligo Safe Wash Relief Ink
- Speedball Deluxe Soft Rubber Brayer, 4-Inch (you must buy this roller because this will make or break your design, learned the hard way)
- Sizzix 660200 Big Shot Manual Die
- Acrylic Clear Paint Art Palettes to mix the paint
Purchasing a photopolymer plate through BoxCar Press is very simple. First, create a username and password through their website. Next, click the “Get Plates Made” tab then scroll down to “Place an Order” tab. For the plate type, I used the KF 152 plastic-backed photopolymer plate. Once you click on your plate, it directs you to upload your PDF image of your invite you are wanting to create. My invite was created through Canva where I saved the file as a PDF to upload it into Boxcar Press. Once you get the plate in the mail, then the real fun begins with a lot of trial and error to make sure your invite comes out perfect.
Selecting Fonts for Your Wedding Invitations
The fonts you choose play a significant role in the overall vibe of your invitations. If you’re going for a classic and elegant look, here are some popular calligraphy and sans-serif fonts to consider:
Calligraphy Fonts: White Garden, Eternal Paris, La Bohemienne, and Mozart add a romantic, flowing touch.
Sans-Serif Fonts: Montserrat, Adobe Caslon Pro, and Libre Baskerville offer a clean, modern feel that pairs beautifully with calligraphy fonts for a balanced look.
Invitation Wording Etiquette: Creating an Invitation That Reflects You
When it comes to wording, there’s no one-size-fits-all approach.
You want your invitations to reflect who you are as a couple. I recommend visiting a local stationery shop where you can see examples in person and get help with wording.
In Arizona, The Paper Place, in Scottsdale, offers hands-on guidance, and they can even print your designs at a fraction of the cost of online options.
For a modern twist, I chose a “Kindly Reply” card over traditional RSVP cards.
I also added a QR code on the back, which guests can scan to RSVP online. This offers a contemporary touch while maintaining a sense of elegance.
Crafting the Perfect Invitation Suite: A Personalized Touch
Remember, your wedding invitations are the first piece of your wedding story.
Whether you’re going for a minimalist design or an elaborate suite, what matters most is that your invitations feel personal and reflect your unique style.
Creating custom invitations at home allows you to add those special touches that truly represent you.

Wedding Invitations as an Experience
In the end, your invitations are a way to set the stage for your wedding day and offer a glimpse of what guests can expect.
They are the beginning of the guest experience and an opportunity to create excitement.
So whether you’re crafting them by hand or working with a professional, take the time to make them uniquely yours.
Check out the link below for some of my favorite DIY tools and materials to get started on creating your perfect wedding invitations.
For more wedding planning advice, check out: “Lessons from Planning a Dream Destination Wedding in Positano, Italy”.

